Monday, December 31, 2012

Happy New Year from The Chubby Vegetarian!

This year has been krazy. Seriously, there was so much to be thankful for and also so many unexpected events on both ends of the scale. Reminiscing about 2012 just makes our heads spin. During all of the activity, there remained one constant: we ate some good food that we made right here in the Chubby Vegetarian kitchen. All of it was inspired by our friends, family, great chefs, and amazing ingredients. We even got to venture out of our kitchen a few times in order to share what we like to make with some appreciative folks.

We have learned so much from your feedback and comments, and we're really glad you are here with us in numbers that we never could have imagined when we started this blog back in 2008. We hope you stick around to see what we cook up in 2013. We have a lot to look forward to this year (our book The Southern Vegetarian is coming out in May!), but before we look ahead, we thought we'd revisit some of our most popular dishes (#1-3) and our personal favorites (#4-15). Here is our top 15 from 2012:

1. Vegetarian Meatballs
2. Spicy Quinoa + Black Lentil Salad with Avocado Vinaigrette
3. Smoked Coconut Bacon
4. Miracle Mushroom Gravy over 3-2-1 Drop Biscuits
5. Vegetarian "Midnight Snack" inspired by Restaurant Iris
6. Peanut Butter Swirl Greek Fro-Yo (and a little magic)
7. Super-Moist Banana Muffins
8. Pizza Fritta + Vegetarian Bolognese & Smoked Provolone
9. Sweet Potato Piccata (inspired by The Publican)
10. Vegetarian Mulligatawny: Indian-Inspired Vegetable Stew
11. Vegetarian Shiitake Ramen
12. Better Jalapeño Poppers
13. Cocoa-Hazelnut and Vanilla-Hazelnut Spreads
14. Vegetarian Eggplant Tajine (oil-free and vegan)
15. Mascarpone Banana Pudding (In a Jar)

Wishing y'all a wonderful 2013! We can't wait to see this brand new year unfold, and we can't wait to cook some new stuff and share it all with you.

Saturday, December 29, 2012

Better Jalapeño Poppers


*We're so flattered to be in the running for TheKitchn.com's Best Recipe Blog award. 
Vote HERE. If this is your first time to the TCV site, welcome, y'all!*


Vegetarians don't need another reason to eat another absolutely scrumptious bread/cheese combo, but here goes: like pizza, grilled cheese, cheese toast, cheese and crackers, and even fondue, this spicy combo is a total winner. 

The Chubby Vegetarian version of this omnipresent bar snack, the jalapeño popper, is "better" because it's crunchier, more delicious, and un-fried, unlike its greasy predecessors. Why, they're so simple to put together that you could make 'em with one hand tied behind your back. 

So what are you waiting for? Turn on your little sports game and eat these jalapeño poppers like a sophisticated man...with a fork.


Better Jalapeño Poppers


4 large or 6 medium jalapeño peppers (halved lengthwise, seeds removed)
2 ounces neufchâtel cheese
1 cup shredded cheddar
1/4 teaspoon granulated garlic

1/4 teaspoon cumin
1/4 teaspoon chipotle pepper powder
Zest of 1/2 lime
1 large egg (beaten)
3/4 cup Panko bread crumbs

1 teaspoon olive or canola oil
Sour cream and fresh chives (to garnish)

Place the seeded, cut peppers cut-side-up on a parchment lined baking sheet. Preheat the oven to 350 degrees. In a medium bowl mix the 
neufchâtel, cheddar, garlic, cumin, chipotle, and lime zest together until well incorporated. Divide the mixture among the peppers by stuffing them until the mixture is even with the cut. 

In a medium bowl mix the egg with the panko until well incorporated. Place the mixture atop the cheese stuffed peppers until all of the panko is used. Drizzle peppers with olive oil. Bake for 20 minutes or until  golden brown. Garnish with sour cream and chives and serve immediately. (Makes 8 to 12 poppers.)

Wednesday, December 26, 2012

Paleo Energy Snacks

My sister Lindsey is a great cook. She and her family live in Boulder, Colorado, and they follow the paleo diet: lots of protein, lots of veg, but sugar is out. These little energy snacks definitely count as dessert, though. When we first tried them while visiting out west in July, we knew we would have to beg Linnie to share her recipe. 

These are great snacks before or after a workout or a nice long run. Because they're packed with good fat, they stave off hunger pangs for a good long while. They are quite addictive, too. Best of all, they are really simple and easy to make using your food processor. Here's how she does it. 

Paleo Energy Snacks

10 dates (pitted)
1/4 cup coconut oil
2 tablespoons coconut milk
1/2 cup sliced almonds 
a generous pinch of sea salt flakes
1 1/4 cup finely shredded coconut, unsweetened

In your food processor, add pitted dates, coconut oil, and coconut milk; process until it is smooth. Add sliced almonds and salt and pulse (three times or so) until almonds are broken down but still chunky. Transfer mixture to a medium-sized bowl and mix in the coconut flakes by hand. Using wet hands, form into densely packed spheres smaller than a golf ball. Line snacks up on a parchment-lined pan and bake for 10 minutes on 350 or until slightly golden brown on top. Allow to cool for at least 10 minutes. Store in a container in the fridge. 

Friday, December 21, 2012

Candy Kale Chips

We love lacinato kale, a.k.a dinosaur kale, around here lately and have been wanting to make some kale chips that no one could possibly resist. Using honey and fresh orange juice to take away some of the inherent bitterness in the greens helps to make that happen. Other kale chip recipes have you cook the kale at 350 degrees, but at this temperature, the thin kale goes from limp to burned on the edges in no time flat. We figured out that if we cook the kale at a lower temperature for longer, the result is a crisper, more evenly cooked chip.

Doing something good with the tough stems of kale that are removed before making the chips was a goal, too. This recipe is for a simple, quick dill pickle, but feel free to add whatever spices you like to the pickling liquid. Try it today, and you just might start obsessing over this super-healthy superfood just like we are. 

Candy Kale Chips 

6 cups loose packed laminate/dinosaur kale (stems removed and reserved; about 1 1/2 bunches)
1 tablespoon orange blossom honey
juice from 1 satsuma orange (about 1 tablespoon)
1/4 teaspoon sea salt flakes (+ a pinch or two)
1/8 cup olive oil

Preheat oven to 275 degrees. Cut de-stemmed kale into pieces about 2-3 inches long. Place into a large bowl and set aside. Whisk honey, satsuma juice, olive oil, and 1/4 teaspoon sea salt flakes until emulsified and pour over kale. Massage the mixture into the kale for 1-2 minutes until the leaves are completely coated. Spread kale out -- no leaves should touch -- on a parchment-lined, rimmed baking sheet and sprinkle a pinch of salt on top. Bake for 30 to 35 minutes. Let chips cool and then store them in a glass container. 

Thursday, December 20, 2012

Vegetarian Tom Yum Soup (Oil Free and Vegan)

Anyone who reads this blog knows that we are very susceptible to the power of suggestion. We hear a dish mentioned, and we just absolutely must make it. At the I Love Memphis blog, the Tom Yum soup at Shanghai was mentioned as one of the 10 best things this year. (View the complete list HERE.) 

Anytime I eat Thai food, I always longingly stare at the Tom Yum on the menu. It always contains shrimp stock and chicken stock -- it's just how that soup is made. So, I decided to take matters into my own hands and come up with a great vegetarian version of this classic soup. 

Kombu is the key here. It's a sea vegetable, and it has the highest amount of umami of any vegetable. The part of the shrimp, a classic component of this soup, is being played by king oyster mushrooms which, as you can tell by their name, have a very 

seafood-like texture and flavor. These elements paired with the fragrant punch of the broth, the spiciness of the sambal, and the acidity of the lime make for one great bowl of soup.


Vegetarian Tom Yum Soup

2 stalks  lemongrass
1 quart low-sodium vegetable broth (like Whole Foods 365 brand)
3 lime leaves
1/2 inch sliced ginger
1/2 ounce kombu (about 3 small sheets, rinsed)
1 tablespoon brown sugar
1 tablespoon (or more)  sambal
2 tablespoons vegetarian fish sauce (or soy sauce)

4 cloves crushed garlic
1 cup tomato wedges
1 red pepper (sliced)

1 cup full-fat coconut milk  (like Whole Foods 365 brand)
1 1/2 cups sliced and quartered king oyster mushrooms
1/2 cup fresh cilantro
1 lime (quartered)


Trim the ends off of the lemongrass and peel away the first two layers. With the back of your knife or a frying pan, beat the lemongrass until it splinters. Cut into 4 pieces and set aside. In a large saucepan, bring the broth to a boil with the lemongrass, lime leaves, ginger, kombu, brown sugar, fish sauce (or soy sauce), and garlic. Cover and reduce the heat to a simmer; allow this mixture to cook for 20 to 25 minutes. Strain out the solids leaving only a fragrant broth. Return the broth to the saucepan over medium heat. Add the tomato, red pepper, and coconut milk. Allow the tomato and pepper to warm through. Just before serving, stir in the king oyster mushrooms. (They're easy to overcook and become rubbery of they sit in the hot broth for too long.) Ladle the soup into bowls and garnish with cilantro and a squeeze of lime. (Serves 4 as a starter and 2 for dinner.)


Tuesday, December 18, 2012

Purple Potato Pierogi

If you've never had a pierogi, allow me to describe it to you: it's like a cheesy, potato-y, onion-y ravioli that is seared in butter. These things are, in a word, heaven. Not all pierogi are made with potatoes--some are made with sauerkraut, and some with fruit. In our house, we like the potato ones best. 

Here, we've used purple sweet potatoes (available at Whole Foods) and purple onion to make for a colorful surprise inside the little dumpling. It also makes for a slightly sweet foil to the sourness of the sauerkraut. You can use any kind of potato you want here. Get creative and make it your own. 


Purple Potato Pierogi


1 1/2 cups peeled, chopped purple potato (about 1 medium)

3 tablespoons unsalted butter (divided)
1 1/4 cups finely diced diced purple onion (about 1 medium)
1/4 cup white wine (like Pinot Grigio)
1 cup shredded sharp white cheddar

Kosher salt and cracked black pepper (to taste)
Pierogie Dough (recipe follows)
1 cup vegetable broth (like Whole Foods 365 brand)
Sauerkraut, sour cream, and chives to garnish 

Boil the potato in salted water until tender (about 8 minutes), drain, and set aside in a large bowl. In a medium frying pan over medium heat, melt 1 tablespoon of the butter and cook the onion until translucent and starting to brown. Deglaze the pan with the wine and cook until most of the liquid has evaporated. Add the onion to the potato and mash until no large pieces of potato are left; you want it to have some texture. Fold in the shredded cheese and add salt and pepper to taste.


Roll the dough out using your pasta maker on a number 5. Alternately, roll the dough out using a rolling pin to get the dough just about as thin as possible. Place 1 heaping tablespoon about 1/2 inch apart, fold the dough over, and cut a half-moon shape using a fluted pasta wheel. Continue until all the dough and filling has been used. You can re-roll the scraps and use those if you have more filling to use. Makes about 24 pierogi.


Bring a large pot of salted water to a boil, and in a separate 12-inch frying pan, melt 1 tablespoon of butter over low heat. Boil 12 of the pierogi for about 3 minutes, crank the heat under the butter to high, transfer the boiled pierogi to the buttered pan; allow them to cook undisturbed for 2 to 2 1/2 minutes for a nice sear. Add 1/2 a cup of the vegetable broth and flip the pierogi using a pair of tongs. Repeat this process with the remaining pierogi or freeze them for another day.


Serve the pierogi of a bed of warm sauerkraut garnished with a dollop of sour cream and a sprinkling of chives. Spoon the pan sauce created with the broth and butter around the plate.


Pierogi Dough

1 1/2 cups all-purpose flour (like Whole Foods 365 brand)
1 large egg (beaten)
1/2 cup 2% Greek yogurt (or sour cream)


In a large bowl add the flour and make a well in the center. Add the egg and the yogurt. Mix until a smooth dough forms. Cover and set aside until ready to roll it out.

Saturday, December 15, 2012

Vegetarian Egg Muffin

My first job, apart from working in my dad's paint store color-matching samples of paint chips, was, like many people, at Mc Donald's. It was right around the corner from my house. My buddy Andy and I would work breakfast, which meant waking up (or in many cases, staying up) until 4 a.m. to get the crates of eggs, muffins, gravy mix, and cheese up from the basement cooler and into the kitchen and start cooking. I actually learned a lot about cooking in those years. Burger University was my first and only formal culinary training. We had to memorize cook times, frying temperatures, and the stats on just about every item McDonalds sold in order to become a manager. That's right -- I was a manager at McDonald's when I was 16. I was also vegan at the time. Weird, I know!

We used real eggs in those days, but that was over 20 years ago. I'm not sure how they do it now. Today, I'm still making a version of America's favorite breakfast sandwich, but with a few key changes. We like to use a whole-wheat English muffin, cheddar cheese, and a simple cured slice of portobello mushroom, a terrific vegetarian stand-in for Canadian bacon.

Vegetarian Egg Muffin 

2 thick, large portobello mushrooms
1/4 teaspoon kosher salt
1/2 teaspoon cane sugar (like Whole Foods 365 brand)
3-4 drops liquid smoke
4 slices sharp cheddar cheese (like Whole Foods 365 brand)
4 whole-wheat English muffins (split, toasted)
4 poached eggs*

The first step to making this breakfast sandwich is to cure the mushroom slices overnight, so it's best to do this ahead of time. Slice the mushrooms about 1/4-inch thick starting at the top of the mushroom and working across parallel to the gills. (You should be able to get 3 to 4 slices out of each mushroom before getting to the gills.) Save the gills and the rest of the scraps for another use. Mix the kosher salt and sugar together in a small bowl. Into a glass container, place a slice of the mushroom and sprinkle it with the salt and sugar mixture. Continue until all slices and seasoning have been used. Add the liquid smoke, cover, and place in the fridge overnight. The salt and sugar will draw a lot of moisture from the mushrooms. 

To assemble, place the cheese on the toasted  muffin. Sear cured mushroom slices in a a hot, dry pan for a few seconds until brown. Place 1 or 2 mushroom slices on top of the cheese, top with poached egg, salt, pepper, and the muffin top. Wrap it up and take it on-the-go or sit down and enjoy it with a cup of espresso. Either way, it beats the drive through.

Makes 4 breakfast sandwiches.

*How to poach an egg: Fill a 10-inch frying pan 1/2 full of water and set it over medium 
heat. Add to it 1/ 4 cup white vinegar and 1/8 cup kosher salt. That seems like a lot of salt, but think of it like salting pasta water. Once the water starts to gently simmer, slowly crack an egg into the water. By slowly I mean open it halfway and let the albumen touch the water for a few seconds then gently let the rest of the egg fall into the water. This will make for a more compact egg. Be patient! Once the white has mostly set, you may flip the egg using a spatula. Push the egg against the curved edge of the pan and it should flip. Flipping it makes it cook faster, but you will loose that beautiful yellow yolk showing.

It takes about 5 minutes for a runny yolk, 6 for a slightly set yolk, and 7 to 8 to form a little, yellow, rubber ball of a yolk. You can poach the eggs ahead of time and cool them in an ice bath once they are cooked to your liking. To reheat them place them in hot water for a few seconds.

The trick is the vinegar. It coagulates the albumen as soon as it hits the water so the egg doesn't go everywhere.

Wednesday, December 12, 2012

Clementine Pizzelle Cannoli

Our good buddy Aaron makes a huge batch of pizzelles, traditional Italian Christmas cookies, every year. We look forward to his cookies as a favorite holiday tradition. Last year, after he had finished making the cookies, we borrowed his pizzelle iron, a Brame family heirloom, along with his aunt's handwritten recipe for pizzelles. We had every intention of getting right on it. We had that thing for nearly a year before we struck out on our own and made some pizzelles, but we're glad we finally did! Now we are considering buying a pizzelle iron of our very own.

These make great cookies on their own, but as usual, we like to carry things way too far in the kitchen. So, we stuffed these delicious cookies cannoli-style with two sweetened Italian cheeses. Serve them with hot tea or espresso and watch the The Snowman with some people you like.

Clementine Pizzelle Cannoli

Pizzelles

2 eggs (beaten)
2/3 cup cane sugar
2/3 cup soy or olive oil margarine (melted)
1 cup plus 1 tablespoon all-purpose flour
2/3 tablespoon anise powder
2/3 tablespoon vanilla
zest of 1 clementine
Clementine Cannoli Filling (recipe follows)
Chocolate shavings, supremed clementines, and powdered sugar (optional, to garnish) 

Preheat the pizzelle iron. Mix the eggs, sugar, margarine, flour, anise, vanilla, and zest together in a large bowl. (The result sould look like a loose cookie dough.) Drop dough by the tablespoon into pizzelle iron and close, wait 30-45 seconds, and retrieve the pizzelle using kitchen tongs. While the cookie is still hot, curl it into a tube shape and place it seam-side-down to keep it from unfurling. 

Remove the filling bag from the fridge and snip off one of the corners using kitchen shears. Using it like a pastry bag, fill each cannoli-shaped pizzelle from both ends. Garnish and serve. Once filled, the shells will stay crispy for a few hours. Overnight, the shells will soften just a bit which is still delicious. (Makes 15-18 cannoli.)

Clementine Cannoli Filling

1 15-ounce container part-skim ricotta (put into a mesh strainer over a bowl and allowed to drain overnight)
1 8-ounce container mascarpone
1/2 cup powdered sugar
1/8 teaspoon kosher salt
1/2 teaspoon vanilla
Zest of 2 medium clementines
1/2 cup almond flour (toasted in the microwave for 1 minute)


In the work bowl of your food processor, blend the ricotta, mascarpone, sugar, salt, vanilla, zest, and almond flour until smooth. Place mixture into a gallon-size food storage bag and place in the fridge to chill.  


Monday, December 10, 2012

Black-Eyed Pea and Collard Greens Quiche

While jumping way far ahead and skipping Christmas supper (don't worry, we'll come back to it!), we have to tell you that we decided that this Black-Eyed Pea and Collard Greens Quiche would be the perfect dish to serve on New Year's Day whether you are just bumming around the house or hosting friends and welcoming in the new year. You see, we Southerners always have black-eyed peas on New Year's Day because they bring both good luck and money. How's that, you ask? In the dead of winter, as a new year begins, having a peas is a symbol of plenty, and the greens represent money, cash, smack-a-roos. It's an old Southern tradition that I've never strayed from. But most of all, we eat black-eyed peas and greens on New Year's Day because our grandmothers told us to, and I for one ain't arguing!

You can make this a day or two ahead of time and keep it in the fridge for a relaxing first day of 2013. Serve this alongside some of our freshly made Jalapeño and Smoked Cheddar Cornbread and a simple salad. Everyone will want to be at your house next year.

Black-Eyed Pea and Collard Greens Quiche

Basic Pie Crust
1/2 cup blanched collard greens (about 1 bunch)
1 tablespoon unsalted butter (like Whole Foods 365 brand)
1 1/2 cups diced shiitake mushrooms
1 small white onion (about 1 1/2 cups, diced)
2 teaspoons soy sauce
1/4 teaspoon liquid smoke
1 tablespoon brown sugar
1/4 cup heavy cream
3/4 cup milk
4 large eggs (beaten)
1 cup prepared black-eyed peas (rinsed and drained)
1/4 teaspoon cracked black pepper
sea salt (to taste)


Make the pie crust dough according to the recipe and set it in the fridge to rest for 20  minutes -- or use a prepared pie crust to save time. Trim the leaves of the collard greens away from the tough stem. Toss the stems in the compost pile. Blanch the remaining green leafy parts in super-salty water for about 2 minutes until they turn bright green. Remove greens from the pot and run cold water over them to cool them down. Squeeze all of the liquid from the collards. (Be diligent! You don't want soggy greens to weigh down your quiche.) Using a food processor or a sharp knife, mince the greens until very finely chopped.

Preheat the oven to 350 degrees. Roll out your pie crust and fit it into a 10-inch pie plate. Cut off the excess using kitchen shears, mark the edges with a fork, and dock the bottom of the crust with the tines of the fork. Par-bake the crust for 10 minutes. Then remove crust and set aside to cool until ready to fill.

Heat a 12-inch skillet on high heat. Add butter; immediately after it's melted, add the mushrooms and onion. Continue to cook on high heat, stirring often, until the onions have softened and are starting to brown. Remove the pan from the heat and stir in the soy sauce, liquid smoke, and brown sugar. Allow mixture to cool.

In a large bowl combine the cream, milk, and eggs. Add to that the greens, mushroom and onion mixture, black-eyed peas, pepper, and salt. Pour mixture into the par-baked pie crust and bake for 40 minutes or until the center puffs us. Allow quiche to cool. Slice and serve. (Makes 8 pieces. Serves 4-6 people.)

Wednesday, December 5, 2012

Vegetarian Orange Beef with Portobellos and Satsumas

Many people don't realize that satsumas and clementines are fall fruits. They are at their peak right when it's starting to get cold outside. I'm not sure why, but this year's crop seems especially delicious -- particularly the satsumas. 

We wanted to do a simple, savory dish with this in-season  fruit that usually only sees the dessert table. Our take on the Chinese take-out classic orange beef will make you wonder why anyone would relegate this shapeshifter to a life as only dessert.  

Vegetarian Orange Beef with Portobellos and Satsumas

2 medium portobello (large dice, about 3 cups)
1/4 cup corn starch (plus 1 teaspoon)

1 cup canola oil (like Whole Foods 365 brand)
2 medium satsumas (segments and zest)
1 2-inch piece ginger (peeled, microplaned)
1 cup vegetable broth (like Whole Foods 365 brand)
1/4 cup mirin (sweet rice wine)
1 tablespoon soy sauce (like Bragg's)
1 tablespoon sambal
1 teaspoon brown rice vinegar
1/2 teaspoon toasted sesame oil
1/2 teaspoon granulated garlic
1 tablespoon cane sugar 
(like Whole Foods 365 brand)
2 1/2 cups broccoli florets
2 cups cooked white or brown rice

Toss the diced portobello mushrooms with the cornstarch to coat. In a separate bowl, combine the zest, ginger, broth, mirin, soy sauce, sambal, brown rice vinegar, sesame oil, granulated garlic, and sugar. In a wok or large frying pan, bring the canola oil up to 350 degrees over medium-high heat. Fry the cornstarch-coated mushrooms in the canola oil until golden brown (about 7 minutes). Remove mushrooms from the oil and drain them on paper towels. Pour off all of the oil from the wok into a heatproof bowl. Add the broth to the hot wok and bring it to a boil and whisk in the reserved teaspoon of cornstarch. Once it starts to thicken, add the broccoli florets and the satsuma segments, cut the heat off, and cover for 5 minutes. Add the fried mushrooms and toss to coat. Serve over rice. (Makes 2 servings.)

French Onion Grilled Cheese

French onion soup has ruined more than one article of clothing since its invention. You can't wait to dig in, and as soon as you press the spoon into the gooey cheese, the hot broth jumps out. I specifically remember a white shirt from U.S. Male that I got for 8th grade graduation that got the french onion treatment at Harry T.'s in Destin, Florida. (Why was I eating French onion soup at the beach during the summer? I really don't know, to tell you the truth.)

Well, put your bibs away! We have invented a safer, cuter french onion grilled cheese. It's a mix of the soup you remember and the grilled cheese you always loved.

French Onion Grilled Cheese

4 large white or yellow onions (thinly sliced, about 7 cups)
3 tablespoons unsalted butter (divided)

1 cup red wine
1/4 teaspoon cracked black 
pepper

1 tablespoon vegetarian worcestershire sauce
1 teaspoon sherry vinegar
5 sprigs fresh thyme
1/2 teaspoon granulated garlic
2 bay leaves
2 teaspoon soy sauce
1 quart vegetable broth (like Whole Foods 365 Brand)
8 ounces gruyere (shredded)
8 slices bread


In a large soup pot or Dutch oven, layer in the onions and 2 tablespoons of the butter. Cover and set the heat to low for about 20 minutes. Remove the cover and raise the heat to medium. Continue to cook and occasionally stir until the onions are deeply browned, which will take another 20 minutes. Deglaze the pan with the red wine; make sure to scrape up any bits that are stuck to the bottom. Increase the heat and reduce the wine by half. Now add the pepper, worcestershire, vinegar, thyme, granulated garlic, bay leaves, soy sauce and vegetable broth to the pot. Stir to incorporate, bring to a simmer, cover, and reduce the heat. Allow mixture to cook for 20 to 30 minutes so the flavors can meld.

Strain the soup through a fine mesh sieve and fish out the bay leaves and thyme stems. Return the broth to the soup pot in order to keep it warm.


Assemble the grilled cheese sandwiches by adding 1/3 cup of grated gruyere and 1/3 cup of the onion mixture each to 4 slices of bread. Top with remaining bread slices. Add the remaining tablespoon on butter to a large frying pan and melt the butter over medium heat. Grill the sandwiches for about 3 minutes per side or until bread is golden brown and the cheese has meted. Serve grilled cheese with a cup of warm broth for dipping. (
Makes 4 servings.)

Monday, December 3, 2012

Cocoa-Hazelnut and Vanilla-Hazelnut Spreads

Earlier this year, I thought nothing could beat my old favorite stuff, but making my own convinced me otherwise. I absolutely love this gianduja (chocolate hazelnut spread) recipe and use it often; as a basis for the recipes, I used similar ratios and the same process, but the results are more to my taste. I have a few simple changes: powdered sugar instead of sometimes-hard-to-find demerara sugar, which is grainy in a good way, but a little crunchy in a spread. I use both a 3.5-ounce milk chocolate bar and a little cocoa powder. And why not also make a plainer hazelnut cream while you're at it? It tastes really pure and subtle, and we may just trot it out this week for a holiday cookie filling.

Cocoa-Hazelnut Spread


1 cup hazelnuts
1/3 cup powdered sugar (Whole Foods 365 brand)
1/2 teaspoon sea salt
2 tablespoons cocoa powder
1 3.5-ounce milk chocolate bar (Whole Foods 365 Organic brand)
1/4 cup grapeseed or canola oil

Preheat oven to 375 degrees. Toast hazelnuts for about 7 minutes or until fragrant. Set aside to cool. Put powdered sugar, salt, cocoa, and chocolate into the food processor. Rub hazelnuts with a kitchen towel to remove some of the thin, dark skins. Add cooled hazelnuts to the mixture and run the food processor until mixture is a fine crumb. While it is still running, slowly drizzle in oil and let machine run until spread is fairly smooth. Store it on the counter in a jar or in the fridge if you want it to be less runny.

Vanilla-Hazelnut Spread

1 cup hazelnuts
1/4 cup powdered sugar (Whole Foods 365 brand)
1/4 cup grapeseed or canola oil
1/8 teaspoon vanilla powder
1/2 teaspoon sea salt

Preheat oven to 375 degrees. Toast hazelnuts for about 7 minutes or until fragrant. Set aside to cool. Put powdered sugar, salt, and vanilla into the food processor. Rub hazelnuts with a kitchen towel to remove some of the thin, dark skins. Add cooled hazelnuts to the mixture and run the food processor until mixture is a fine crumb. While it is still running, slowly drizzle in oil and let machine run until spread is fairly smooth. Store it on the counter in a jar or in the fridge if you want it to be less runny. 


Thursday, November 29, 2012

Vegetarian Mulligatawny: Indian-Inspired Vegetable Stew

Different versions of this spicy, rich Indian stew have been bouncing back and forth between us and our friend Michael from Midtown Stomp. I talk about him a lot here because he's a great friend and really talented with flavors of all kinds. He even has a really cool recipe for Oyster Mushroom Rockefeller in our upcoming cookbook. It was his innovation to add dried cherries instead of boring old raisins and also a dash of cinnamon to the mulligatawny. These additions really upped the ante.

To take it one step further, we've added a simple-but-hugely-flavorful homemade curry paste that easily comes together in the work bowl of your food processor. I stumbled upon this method while developing our Gumbo recipe and thought it would work well here -- and it did! I ate this stew for dinner one night, lunch the next day, and then had it with a poached egg on top for breakfast the following morning. That's how seriously good it is.

Veg m
ulligatawny goes great with our homemade Whole Wheat Naan. You can serve it on top of rice or eat it just how it is. Your call. 

Vegetarian Mulligatawny: Indian-Inspired Vegetable Stew


1 medium onion (roughly chopped)
1 2-inch piece fresh ginger
8 cloves garlic (peeled)
1 medium tomato (cored
)

2 tablespoon curry powder
1 teaspoon coriander

1 teaspoon cumin
1/2 teaspoon cinnamon
1 tablespoon sambal
1 tablespoon cane sugar 
(like Whole Foods 365 brand)
1 tablespoon white vinegar
1 1/2 tablespoons unsalted butter (like Whole Foods 365 brand)
1/2 cup lentils
3 cups vegetable broth (more if needed, like Whole Foods 365 brand)

1 tablespoon soy sauce (we like Bragg's)
1/2 cup chopped dried cherries
1 medium Russet potato (peeled and diced)
1 medium green pepper (peeled and diced)
1 medium head of cauliflower (broken into florets)

4-5 medium carrots (diced)
1 can coconut milk (like Whole Foods 365 brand)
Kosher salt and cracked black pepper (to taste)
1 cup salted whole cashews (to garnish)
1/2 cup cilantro leaves (to garnish)

Into a food processor place the onion, ginger, garlic, tomato, curry powder, coriander, cumin, cinnamon, sambal, sugar, and vinegar. Blend until a loose paste forms and all ingredients are throughly blended. 

In a large soup pot or Dutch oven over medium-high heat, melt the butter and add the curry paste. Cook, stirring frequently, until most of the moisture has evaporated and the paste becomes very thick. Add the lentils, broth, and soy sauce. Stir, cover, and allow mixture to cook for 10 minutes to soften the lentils. Add the cherries, potato, pepper, cauliflower, carrots, and coconut milk. Add salt and pepper to taste.


Cover and reduce heat to a simmer. Cook until vegetables are tender. Serve garnished with cashews and cilantro leaves and add a side of naan. (Makes about 3 1/2 quarts or about 6 servings.)


Wednesday, November 28, 2012

Couscous and Feta Stuffed Eggplant

We've had this dish on several occasions, and it's always a hit with both of us. The red pepper and apple add some nice sweet notes to the couscous stuffing, and the feta gives the whole dish a nice salty kick. Oh, and don't skip the sherry vinegar. It adds an little bit of acidity that the dish needs in order to come alive. All of this and pine nuts, too -- it's becoming our new weeknight staple!

I eat mine skin and all while A. scoops each bite from the eggplant skin. There is no right or wrong way to eat this Mediterranean-inspired dish. It's a good thing to make for the family or bring to a dinner party with friends.

We made these from the last eggplants to come out of the family garden. Now all of the tomato, eggplant, cucumber, and pepper plants that provided us with so much summer produce have been added to the compost pile, and Steve has planted loads of cabbage that will do well over the winter.

Couscous and Feta Stuffed Eggplant

4 Italian eggplants (or small American eggplants)
1 box Near East Roasted Garlic and Olive Oil Couscous (available at Whole Foods)
1 1/2 cups diced red pepper (about 1 large)
1 cup diced Gala or Pink Lady apple (peeled, about 1 medium)
1 teaspoon sherry vinegar
1/4 cup toasted pine nuts
1/4 cup chopped curly parsley
1/2 teaspoon crushed red pepper
Cracked black pepper  (to taste)
4 ounces feta (diced, about 1 cup)
2 eggs (beaten)

1 cup 2% Greek yogurt (to garnish)

Prepare the eggplants using THIS quick and reliable method from Fine Cooking. Set aside the roasted eggplants to cool. This step can be done ahead of time, and the eggplants can be stored in the fridge for up to 3 days.

Preheat your oven to 350 degrees. Make the couscous according to package directions. In a large mixing bowl, combine the couscous, red pepper, apple, vinegar, pine nuts, parsley, crushed red pepper, cracked black pepper, feta, and eggs. Mix until all ingrediens are incorporated. 

Using your hands, stuff the eggplants. Gently press the couscous mixture into the eggplant until a mound of filling is firmly packed into the baked eggplant. Place onto a 
parchment-lined baking sheet. Repeat until all filling has been used. If you have a little extra, just bake it in an oven-proof dish as a pre-meal snack.

Bake stuffed eggplants for 25-30 minutes. Serve warm with a dollop of Greek yogurt. (Makes 4 servings.)

Thursday, November 22, 2012

Super-Easy Vegetarian Mexican Pizza

Four days of non-stop cooking and Thanksgiving celebrations this week felt like one long, raucous meal with friends and family, a revolving potluck that bounced from house to house. We made our favorite dishes and started some new traditions. And at the end of it, we are exhausted

But then tonight dinnertime rolled around as usual. As expected, we were so hungry again and actually have very few leftovers -- just a few pieces of asparagus, some pecan pie, and the slight, sad end of Sweet Potato Piccata.  This fast-food inspired meal is the perfect thing when assembling -- there's no way something this easy can be called cooking!

Super-Easy Vegetarian Mexican Pizza

2 10-inch whole wheat tortillas
1 tablespoon canola oil (like Whole Foods 365 brand)

1 can refried pinto beans (like Whole Foods 365 brand)
1 cup shredded smoked mozzarella
2 large Haas avocados
1/2 lime
Kosher salt and cracked black pepper (to taste)

1/2 cup finely shredded cabbage
1/2 cup chopped tomato
1 tablespoon chopped chives
1/4 cup sliced picked jalapeños
Hot sauce of your choice


Preheat the oven to 350 degrees. Brush both sides of each tortilla with the canola oil. Place on a large baking sheet so they don't overlap. Cook in the oven for 15 to 20 minutes or until crispy. Remove from the oven and allow to cool enough to handle. 

Spread about 1/2 cup of the refried pinto beans on each of the crispy tortillas; you will use more than half the can. Reserve the remainder for another use. Now, sprinkle the cheese on one of the bean-covered tortillas. Return them to the oven for another 10 minutes or until the cheese has melted and the beans are warmed through. 

Make a simple guacamole by combining the flesh of the avocado and the lime juice in a medium bowl and mashing it with a fork until there are no large chunks left. Add salt and pepper to taste. Set aside until ready to use.

Stack the bean-covered tortilla onto the bean-and-cheese-covered tortilla. Top that with all of the simple guacamole, cabbage, tomato, chives, pickled jalapeño, and hot sauce. Chop it into quarters and serve.

Tuesday, November 20, 2012

Five Quick Questions with Chef Miles McMath of St. Jude

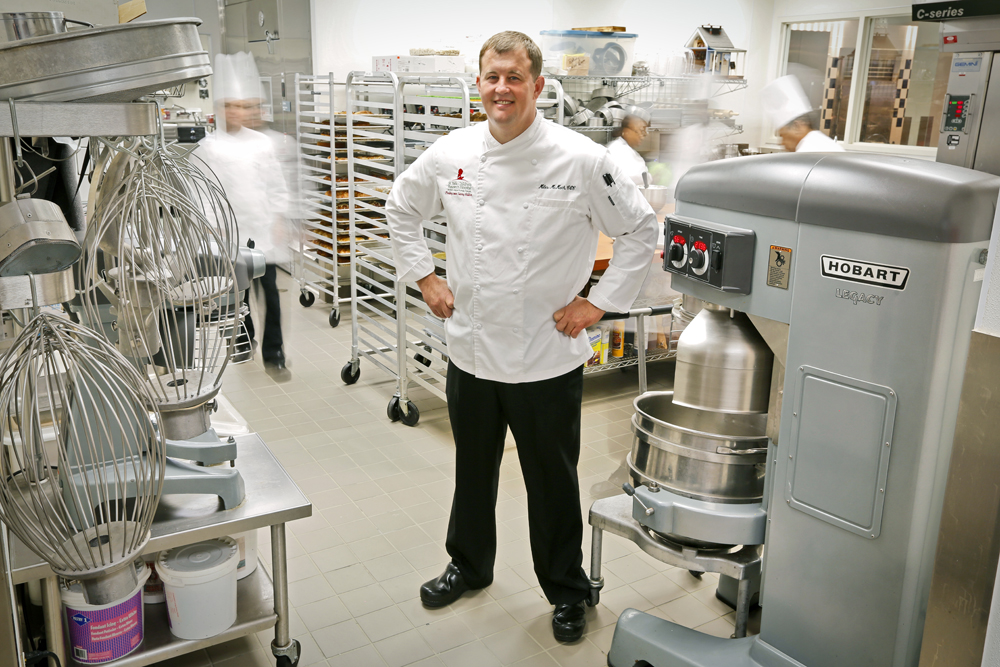
We were lucky enough to score an interview with one of our favorite chefs, Miles McMath of St. Jude Children's Research Hospital here in Memphis, Tennessee. He has a unique mission in the kitchen: to help the kids of St. Jude heal by providing them and their families nourishing food free of charge. What he and his amazing staff do on a daily basis is so important. Miles is one of the big reasons why I run the Memphis Marathon as a St. Jude Hero. Our friends and readers have been so kind; we have already busted down our $2,500 goal and raised almost $3,500 for the kids of St. Jude, but why stop there?


The Chubby Vegetarian: You have a lot of experience in using diet to promote the heath and recovery of the kids of St. Jude. Knowing what you know, what advice can you give the rest of us about this connection and how it pertains to our own health? 

Miles McMath: Eat real food. That has been my primary approach here and at home.  
Whether you’re shopping for groceries or cooking your meals, get your kids involved. Learn to read nutritional labels and teach this to your kids when you’re shopping. Compare and contrast the difference in nutritional content between products (i.e., potato chips and noodles) and help them select the healthiest meals and snacks for their lunch boxes. The key is to also give them a bit of freedom to choose which food products they want. If they select something that is unhealthy, gently remind them of the nutritional content and advise them that they should only eat them occasionally as a treat. When cooking, show them what really goes into the foods they eat and let them help out by ‘decorating’ and garnishing the food, stirring the soup, or setting the table. This encourages kids to be proactive at home and understand about nutritious foods, and it promotes family togetherness.  

This has been a huge success here at St. Jude.  Most of our menus are “Build Your Own.”  This allows kids to be in control of their choices.   Rather than just give a child broccoli, ask them, Which one would you like: broccoli, cauliflower, or kale? 

Have conversations about food. We sit down and discuss likes and dislikes with the kids at St. Jude. This allows us to have an end result that we are both happy with and will best benefit their recovery.

TCV: Right now, what's your current favorite fall dish to make at home for your family? 

MM: Anything that is currently growing in the garden.  Quick sautés such as kale, broccoli or collards with nothing more than a little salt and a splash of vinegar. We’ve also been eating a lot of brown popcorn rice from Cache River Rice in Arkansas.  The kids love it because it smells just like fresh popped popcorn.

TCV: Your pickle bars at local events are already legendary! Would you be willing to share your pickling recipe with our readers? 

MM: Most of our pickles are quick pickles or “Ice Box” pickles (recipe follows).  It's really simple: the fresher the produce, the better the final product.  Just about anything can be quick-pickled. Cucumbers are the most common choice, but any nice, crisp vegetable will do: green beans, cauliflower, carrots, shallots, onions, asparagus — they all make terrific pickles.

Because there are so many different and subtle variations in pickle preparations, everything from the dilution of the vinegar to the inclusion or not of sugar to the selection of flavoring spices, we recommend starting with a basic vinegar-water-salt-sweetener ratio. I have included the ratio that we use here at St. Jude.

 TCV: The St. Jude garden has nearly 60 raised beds and a high tunnel, and the fact that y'all grow much of your own food is so cool. What ingredient has got your attention right now, and what are you doing with it? 

MM: Right now we are finishing up on tomatoes and peppers.  We are pickling and frying the green tomatoes. The peppers are small due to the cold weather, so we are stuffing them and making pepper jelly.  We're still getting a lot of fresh herbs, and we use those daily. Johnny, a chef here from Cambodia, uses the pepper and tomato tops in Asian dishes.  This creates incredible flavors. We are also focusing on building up our compost for next year and keeping our worms producing through the winter.

TCV: On average, St. Jude treats about 7,800 active patients a year. Not one of them pays for treatment -- or even a meal. How important are the amounts that individual donors can give in terms of providing for this?   

MM: Events like the St. Jude Memphis Marathon Weekend are important because St. Jude Heroes are a special group of race participants who raise additional funds for the hospital by obtaining pledges from friends and family. Amazingly, it costs $1.8 million each day to run the hospital, and 75 percent of those funds come from public contributions.


St. Jude Basic Pickling Recipe
  1. Make the brine: The main ingredient in pickle brine is vinegar. White vinegar is most common, but you can also use cider vinegar, wine vinegar, pretty much anything except balsamic, which is too syrupy and would overpower your pickles. Some recipes call for straight vinegar; others dilute it with up to 3 times its volume with water.
  2. Salt is nearly always included in the brine. It draws moisture out of the vegetables, and it encourages the growth of useful bacteria. Amounts vary, from less than a teaspoon to over a tablespoon per cup of liquid.
  3. Many recipes include sweeteners. Sugar is most common, but you'll also see brown sugar and honey. Sweeteners are most often used when vinegar is not diluted with water.

Basic Icebox Pickling Brine Ratio

1 cup vinegar - 1/2 cup water - 2 teaspoons kosher salt – sweetener to taste
  1. Combine ingredients and bring to a boil.
  2. Place vegetables in a clean, dry glass container just large enough to hold all the vegetables. Pour boiling brine over vegetables to cover completely. Cover; refrigerate at least 1 hour. Pickles will keep for about 10 days.

Sunday, November 18, 2012

Vegetarian Thanksgiving 2012

Oh, Thanksgiving: you're almost here! It's our favorite holiday, and we're so looking forward to the week. What could be better than the focus on gratitude, family, and some really great meals? We have grocery shopping today, a ton of prep from here on out, and a lot of cooking to schedule since it looks like the festivities are going to crank up on Monday night and gallop on until Thursday night rest-time. It is going to be a blast to see all the family that we have in town, and my only wish is that the New Orleans branch could be here, too. We will be there with y'all in spirit for sure. 

This wonderful turn of events last week really helped us shine a light on the idea that not every Thanksgiving dinner is focused on a turkey. So for a little inspiration and pre-gaming fun, here are some of our favorite vegetarian Thanksgiving recipes from the past along with a couple of new ones we've been testing out this fall. 

What are your plans for Thanksgiving? Leave a comment below or ask a question if you have one, and maybe we can all figure it out together. 

The Mains: 
Stuffed Acorn Squash

Vegetarian Dumplings

Squash and Sage Lasagna


The Sides: 


The Pies: 
Bourbon Pecan Tart

Sweet Potato Pie with Rosemary Cookie Crust